Dental Blog
Immediate Implant Upper Left Bicuspid
 Immediate extraction and implant placement.
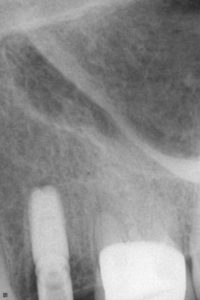
This patient presents with a failing crown on tooth number 25. That means the fifth tooth from the middle on the top left. Looking at the Xray on the left it is the tooth in the middle. This crown has been re cemented 2 times for the patient to buy him time to decide on future treatment. The tooth is decayed and soft under the crown and not suitable for retaining a new crown. I presented him with three options:
- Partial denture (flipper). A removable appliance that would replace the missing tooth. It is taken out at night and cleaned daily.
- Bridge. For this patient that means removing the crown on the tooth next to it, and preparing the two teeth adjacent to the space for crowns. A bridge is simply two crowns with a pontic (false tooth) anchored between.
- Implant. I proposed that we extract the tooth and place the implant in at the time of surgery. This saves the patient a surgery visit and also helps preserve bone.
Removing the tooth and placing the implant
The tooth was extracted atraumatically. The old way to pull teeth was to remove bone, push and pull and get the tooth out. The reasoning was that the bone would grow back so removing it was ok. Today we understand that preserving bone is important for both implants and bridges to achieve the best esthetic result. Preserving bone is much easier then adding/grafting bone.
 Patients tooth area is frozen with local anesthetic. The tooth is removed by carefully wedging an instrument between the root and bone until the tooth becomes loose. Then a firm grip and the tooth is gently wiggled out. No bone is removed in the process.
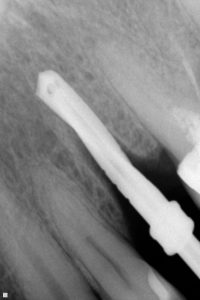
The xray on the right shows the implant drill in place to gauge the angle and location of the implant.
Once I determine the final placement of the implant, it is screwed into place. All voids around the implant and bone are filled with a bone graft material. Everything is covered with a membrane to prevent loss of material or infection. The xray on the left was immediately taken after implant placement but before any bone material is added.
We bring the patient back in 1 week to check healing. Then 4 weeks to remove the membrane (painless procedure, no freezing). We wait 3-6 months for the implant to integrate with the bone.
3 Month evaluation of implant

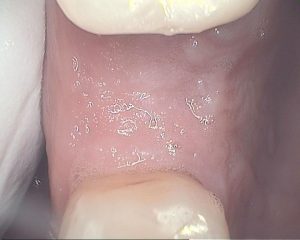
Patient comes back in 3 months to check healing around implant. We see bone has filled in and integrated well around the implant.
The photo on the right shows a view from above. We can see the ridge (bone) is well preserved and nice and wide. We are ready to place an implant crown. Please stay tuned for updates and pictures of each stage. The patient returned for a second appointment to have a healing cap placed.
Smile in a Day: Dr. Jomha’s Advanced Training in Full Arch Dental Implant Placement and Restoration
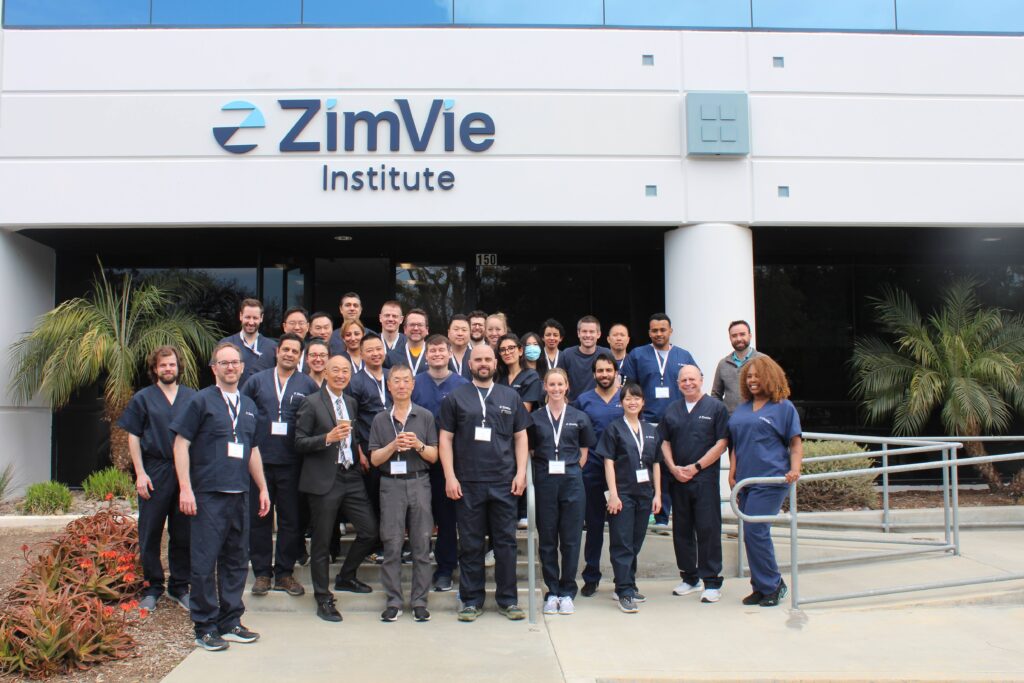
Dr. Jomha recently had the opportunity to travel to Carlsbad, California to train at the ZimVie Institute. As a practitioner who places implants, he was eager to learn advanced techniques in order to provide the best possible care for his patients. During the course, Dr. Jomha and his colleagues learned how to place and restore…
Clear Correct Day
Friday September 17, 2021
BOOK YOUR SPOT. LIMITED AVAILABILITY Your journey to a straighter smile starts now. Join us at Summerlea Dental on Friday, September 17, 2021, for ClearCorrect Day. Our team will be offering complimentary ClearCorrect consultations, scans, snacks, and refreshments all day long. Book Your Complimentary Consult – Save your spot: mobilebooking.summerleadental.com Learn More about how ClearCorrect…


